
Lace Wig Install
Most lace wig install involves glue or gel, and you must be careful about using these chemicals on your hair and skin due to the possibility of damaging your edges or hairline.
How To Put On A Lace Front Wig?
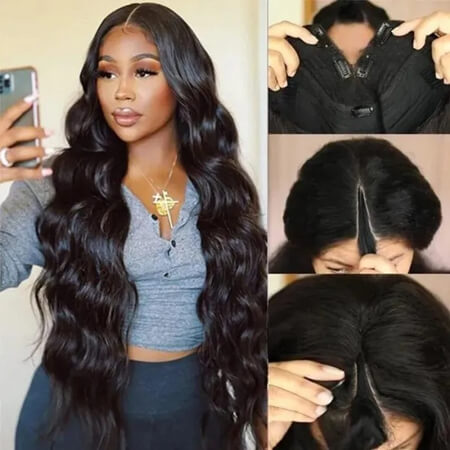
There are two most common types of lace front wigs, 13x4 and 13x6 frontal wigs. The difference between them is the parting space, the 13x6 frontal wig has a deeper parting space. And the installation of them is the same, which is dealing with the lace area.
Lace Front Wig Install
What You Might Need For A Lace Wig Install:
· Wig Cap
· Alcohol Prep
· Skin Protectors
· Wig Glue
· Rat-tail Comb
· Wide-Tooth Comb
· Silk or Satin Scarf
· Foundation
· Eyeliner
· A Bottle Of Clean Water
· Tissue
· Scissors /Dermaplaning Tool
· Edge Control
Step 1: Prepare Your Natural Hair
To protect your natural hair from breakage, you need to make sure your hair is as flat as possible. The traditional way is to create cornrows with your natural hair. You can slick the hair back and use gel or mousse to make the hair flat if you have shorter hair.
Make sure to clean the oils and dirt away from your skin with an alcohol prep, especially the skin of your hairline. Then use a skin protector to protect your scalp and skin.
Step 2: Get Your Wig Ready
Wash your newly arrived wig and give it full conditioning. Giving your wigs a full clean can wash the chemicals. Hair vendors use the chemicals to make sure the wig stay styled during shipping. And Conditioning the wig before the installation can keep your wig alive.
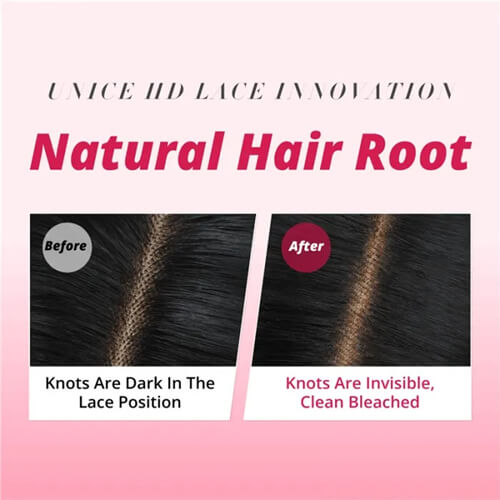
(Optional) Bleach the knots. The knots on wig lace can make the wig look unnatural. If you want to make the hair on the wig look like it comes from the roots, you can take this step. But now some hair vendors have the knot invisible during processing, so you don't have to bleach the knots by yourself.
(Optional) Pluck the wig, some wigs can a high density and the hairline may seem to be an unnatural fuller look. You can pluck it by yourself if you think the hairline has space to look more natural.
Step 3: Install The Wig
Make sure your wig fits perfectly. You can move the wig until the wig lines up your hairline before applying any glue or gel.
Then you can apply lace glue around your hairline not directly put it on your edges and smooth the glue or gels. And use a blow dryer to get it sticky. You can repeat the step to make sure the melt is melted perfectly and strongly with your skin.
Step 4: Finish The Look
The next step is to cut the extra lace. You can use scissors or dermaplaning tools to cut the excess lace as jagged as possible, and then put down the lace to the hairline that is added adhesive.
Then use hair spray to melt the lace and get a natural hairline look. At last use a silk scarf to secure the hairline and wait for the wig for 15 minutes to be secured.
Other kinds of lace wigs, such as closure wig install, are practically the same as a lace front wig install. You can follow the same or similar steps to get your closure wig installed.
Here are some YouTube tutorials for you to try for yourself.
Lace Closure Wig Install
Full Lace Wig Install
T Part Wig Install
Glueless wig install
Glueless wigs, just like the name implies, the wig install requires no glue or gel involved. So it's perfect for people who want to have a protective style without using any chemicals on their natural hair or edges. Since glueless wig is such a hit in recent years, here are some most common types of glueless wigs installed for your reference.
How To Put On A Headband wig?
Step 1: Protect your natural hair by braiding your natural hair into cornrows or braiding your hair to the back. And you can use a wig cap to protect your natural hair from friction.
Step 2: Try out your headband wig to find the best place where the wig can fit your head perfectly. Fix your wig onto your head by using the combs that come with the wig. Then take the headband behind the ears and get the magic tape right in place. And you can make the headband as tight as you want.
Step 3: You can lay your edges or create baby hair. And you can use heat to curl the hair or make it into bone straight style, but keep in mind only human hair headband wigs and heat tolerated synthetic wigs can be applied with heat tools.
U Part Wig Install
Step 1: Wash and condition your natural hair before installing a U-part wig. And section your hair into the middle part, then take out some leave out hair enough to cover the tracks of U part wig. And braid the natural hair into a cornrow to protect natural hair.
Step 2: Install the wig with combs. And take out the leave-out to blend your natural hair with the wig. (Apply heat protectant to keep your hair away from damage brought by the heat)
V Part Wig Install
Installing a v part wig is similar to wearing a U part wig. But a V part wig can allow you to wear it without leave-out.
For a detailed V part wig installation, you can check out the tutorial on wearing a v part wig with leave-out or without leave-out.
 8 Disney Princesses Hairstyle Collection-You Don't Miss
 Swoop Ponytail: How do You Tie a Unique Hairstyles?
 2023 Hottest Trend: Curly Bob Haircuts
 U Part VS V Part Wigs, Which One Is Better?

